Install Mixcore CMS
There are several ways to install Mixcore CMS. Choose the method that best suits your needs.
Option 1: Docker Installation (Recommended)
The easiest way to get started with Mixcore is using Docker and Docker Compose:
# Clone the repository
git clone --branch develop --recursive https://github.com/mixcore/mix.core.git

# Navigate to the project directory
cd mix.core

# Build and start all services
docker-compose up --build

# Access the application at http://localhost:5000
This will set up the entire Mixcore environment including database services automatically.
Option 2: Traditional Web Installation
If you prefer a traditional installation:
- Download the latest release from GitHub Releases
- Extract the files to your web server directory
- Point a web browser to start the installation:
- If you placed the Mixcore CMS files in the root directory: http://example.com/init
- If you placed the Mixcore CMS files in a subdirectory (e.g., "mixcore"): http://example.com/mixcore/init
Installation Wizard Steps
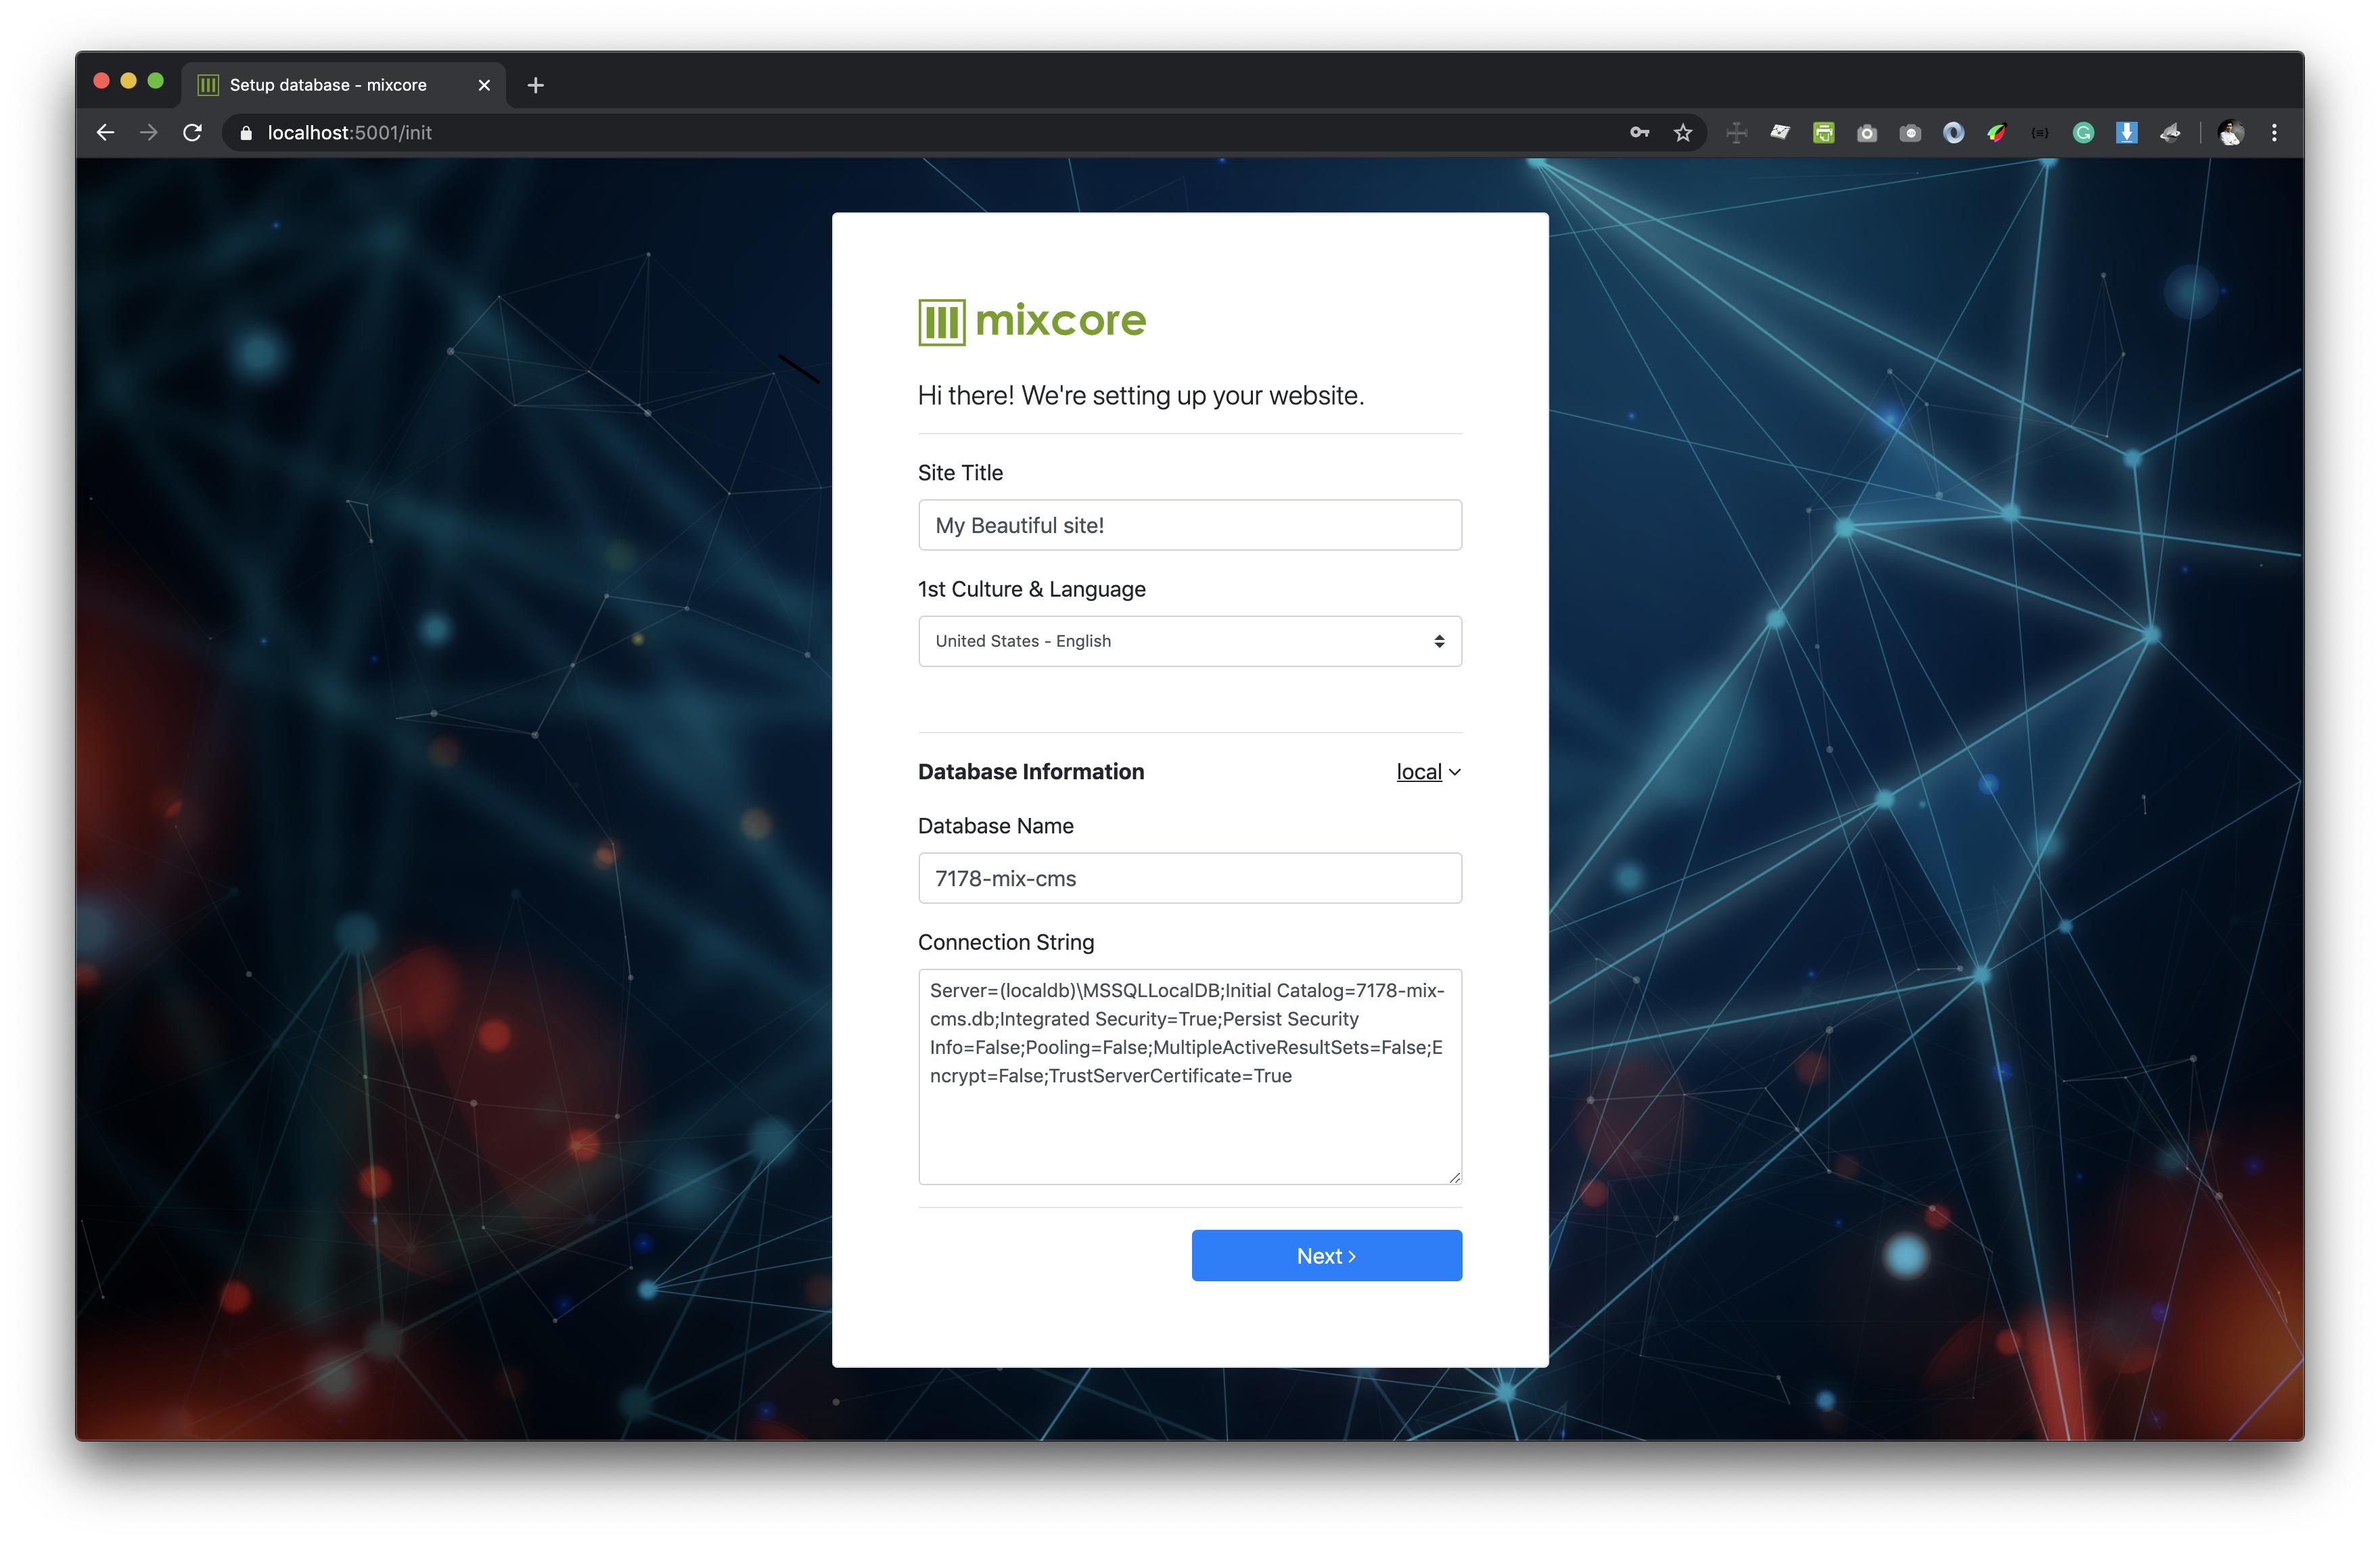
Step 1: Basic Configuration
- Input your "Website Name"
- Choose the default culture/language for your site
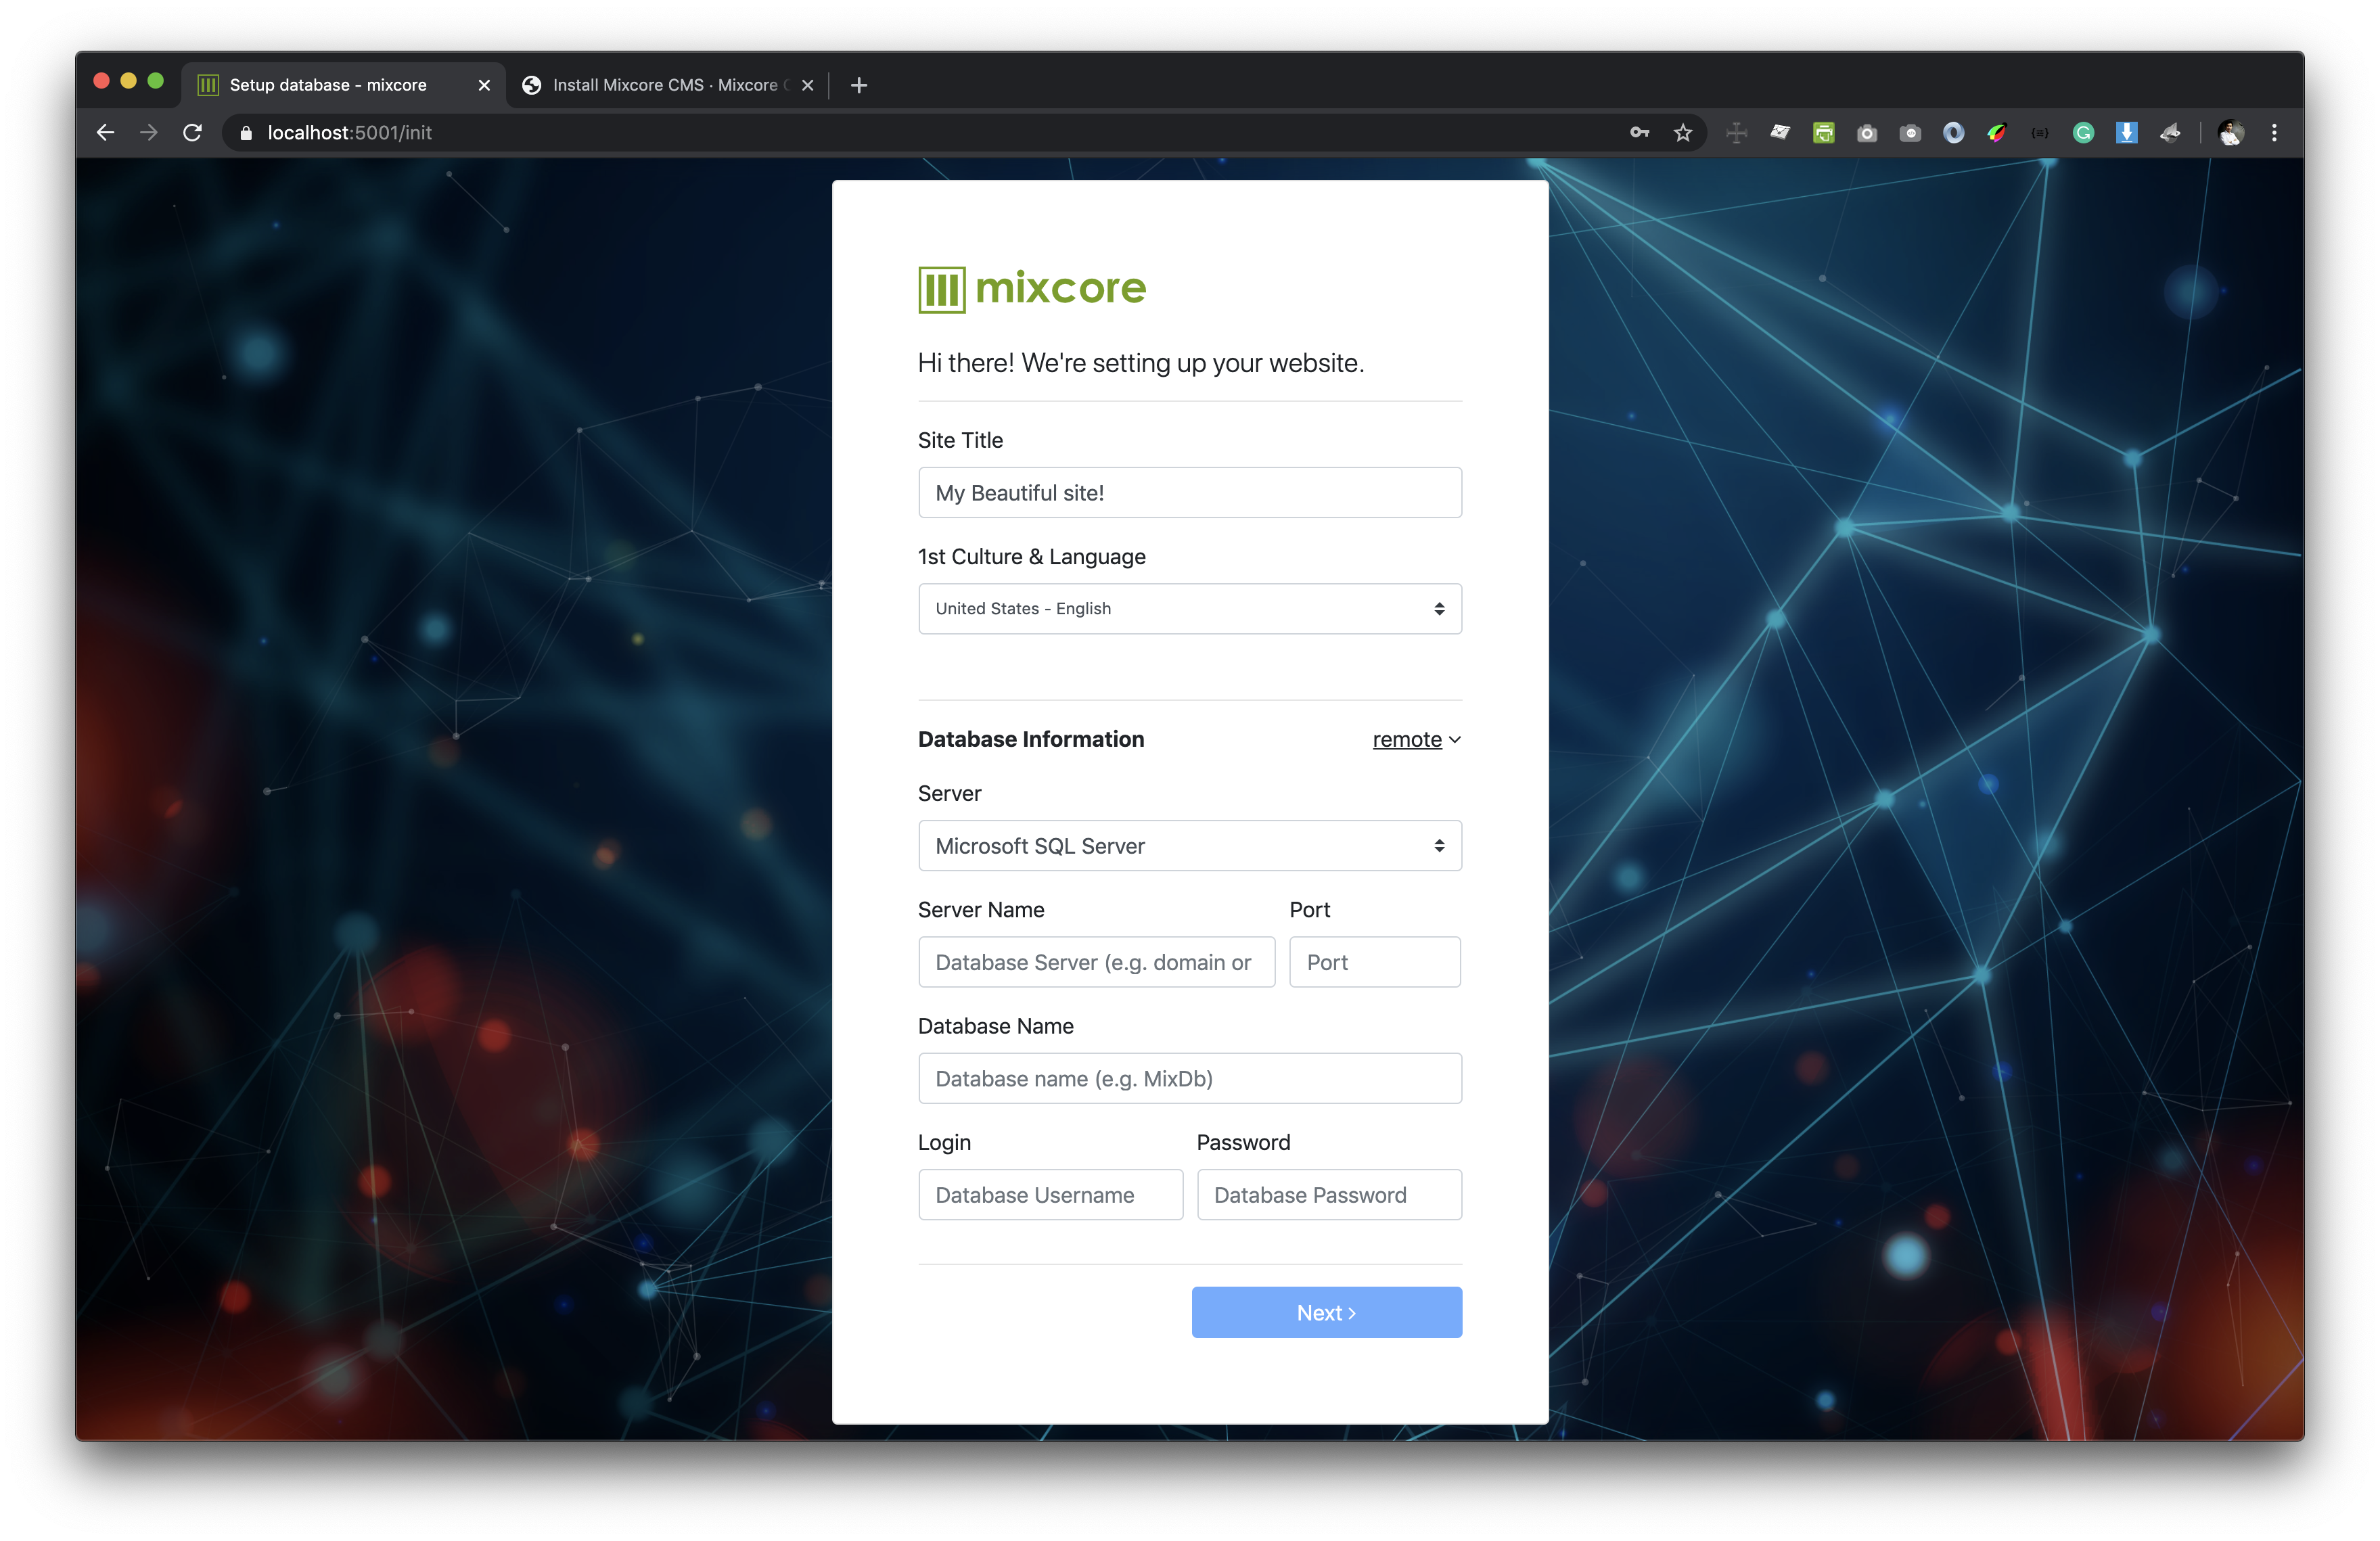
- Choose database connection type:
- Localhost
- Remote Database
- Select Database Provider:
- SQL Server
- MySQL
- PostgreSQL
- ScyllaDB
- Fill in your Database Credentials
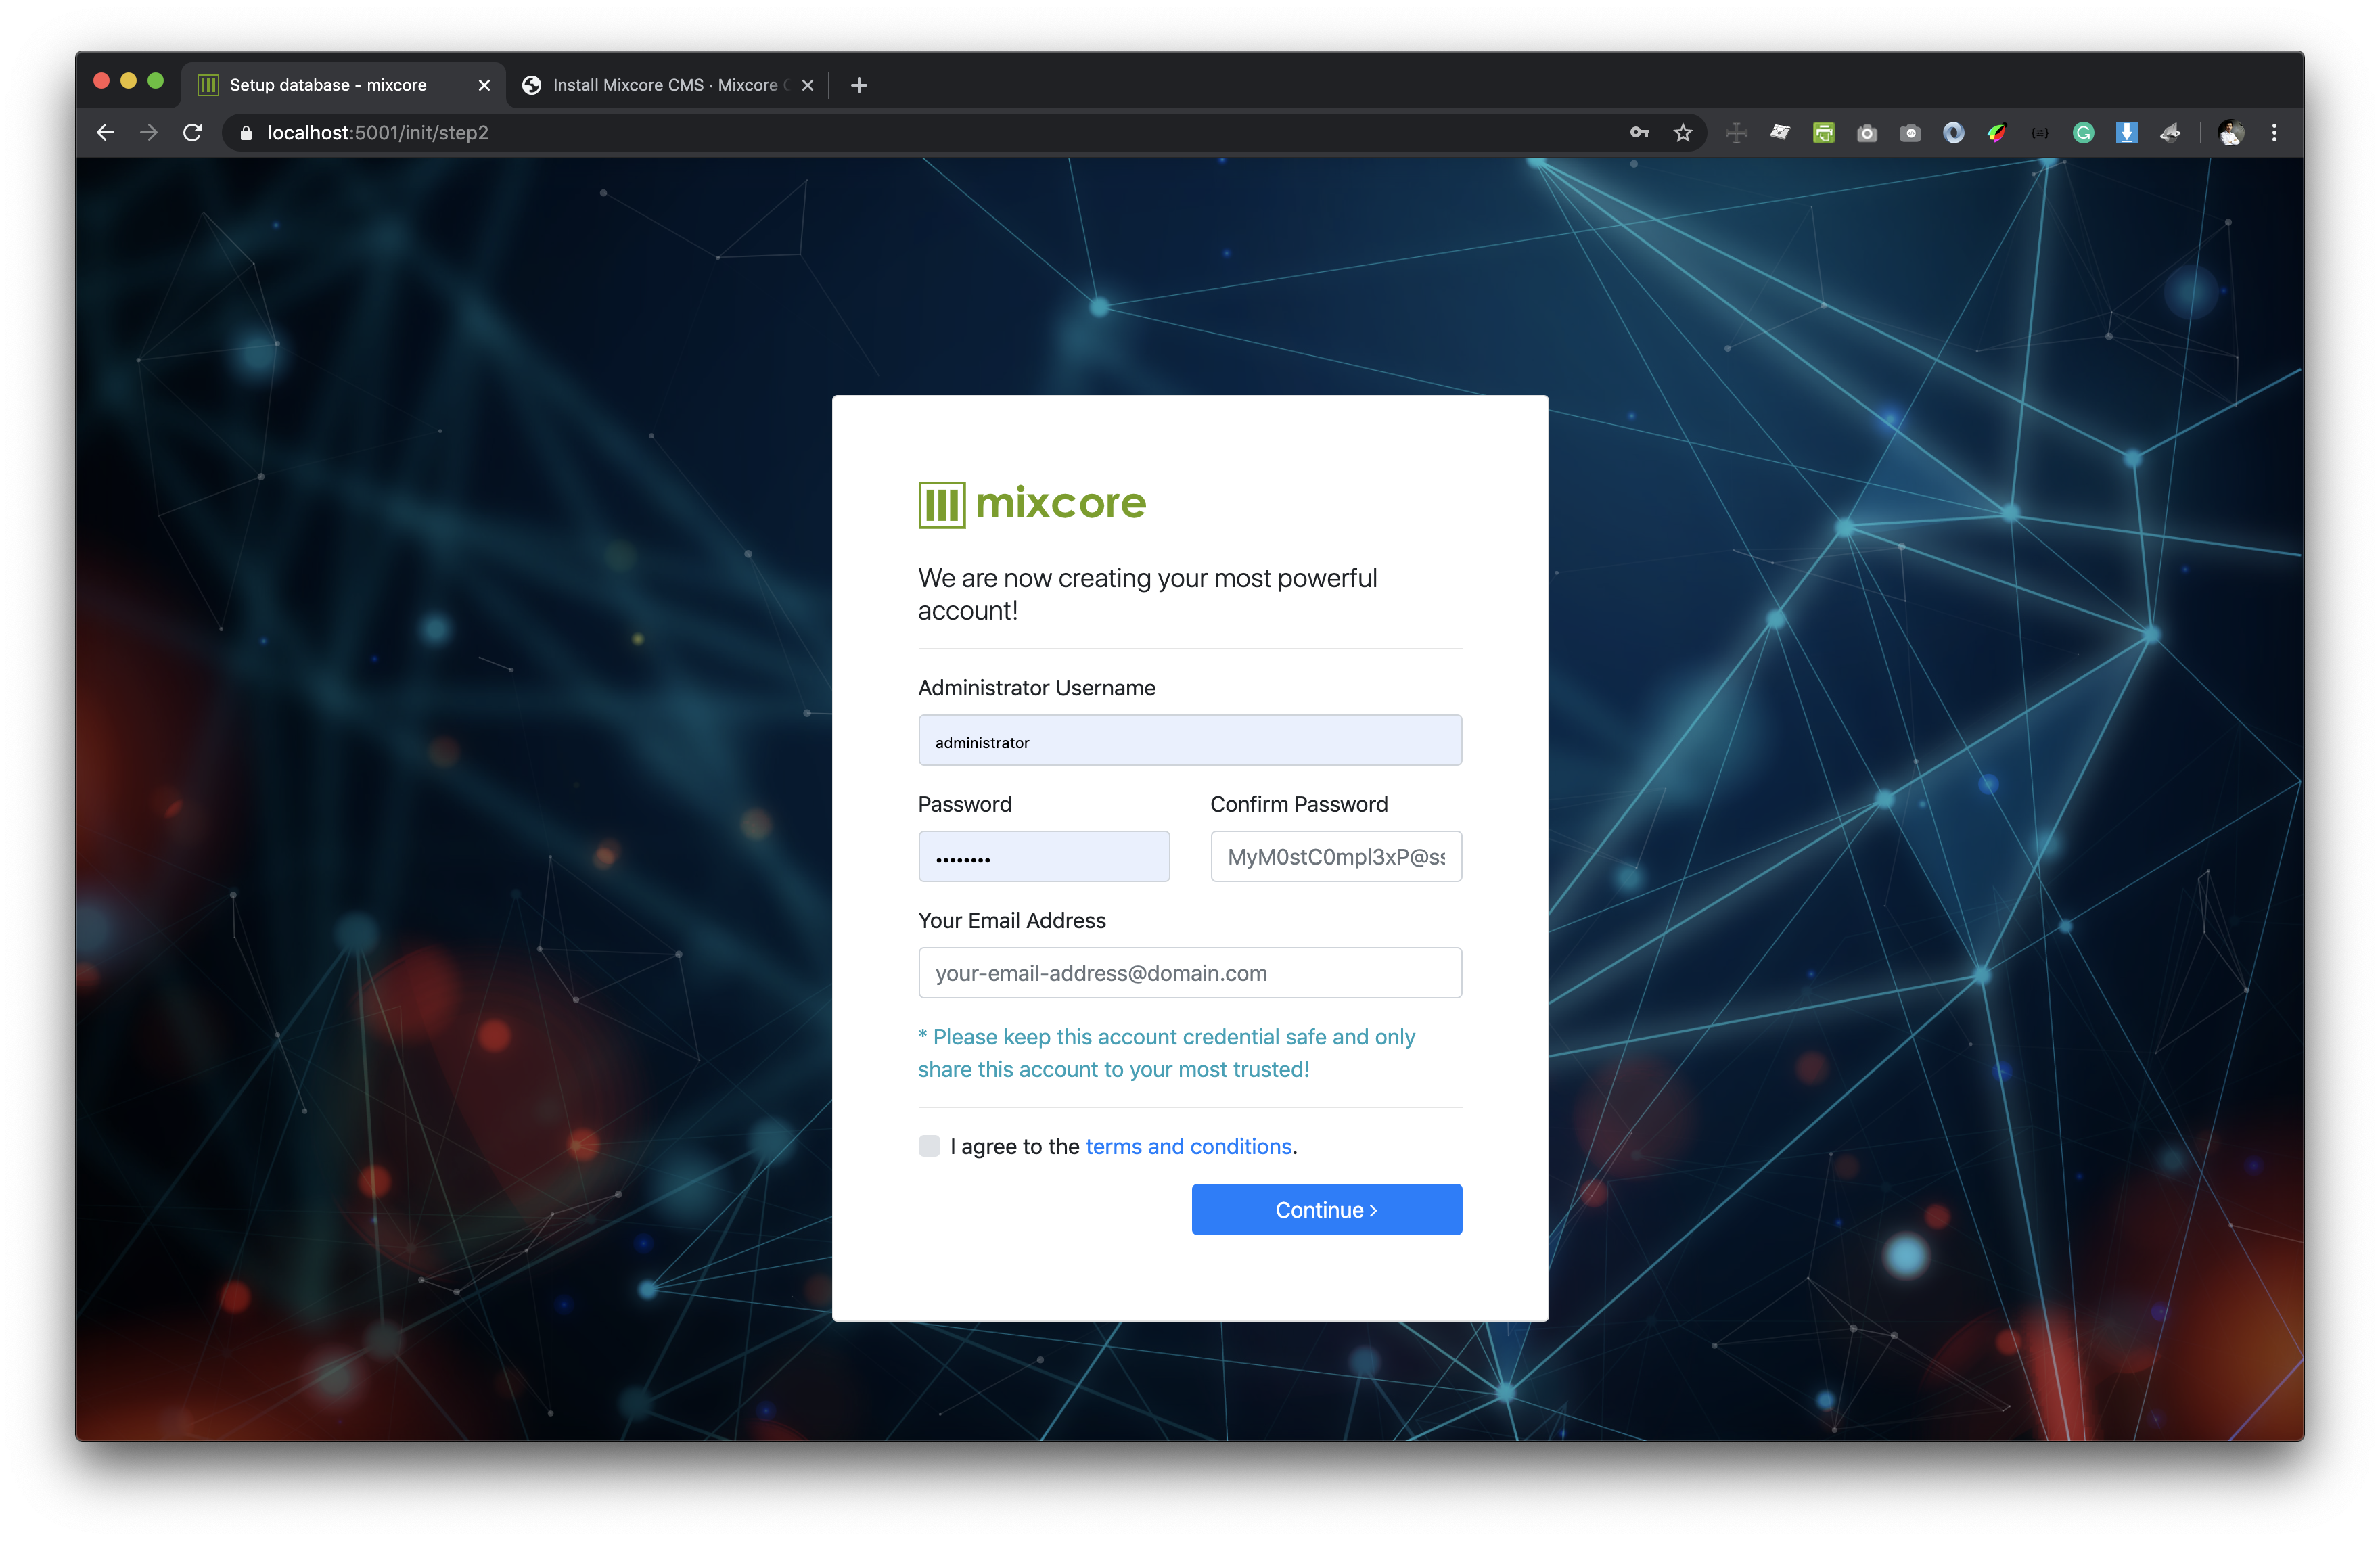
Step 2: Administrator Account
- Create your administrator account
- Set your admin password (use a strong password)
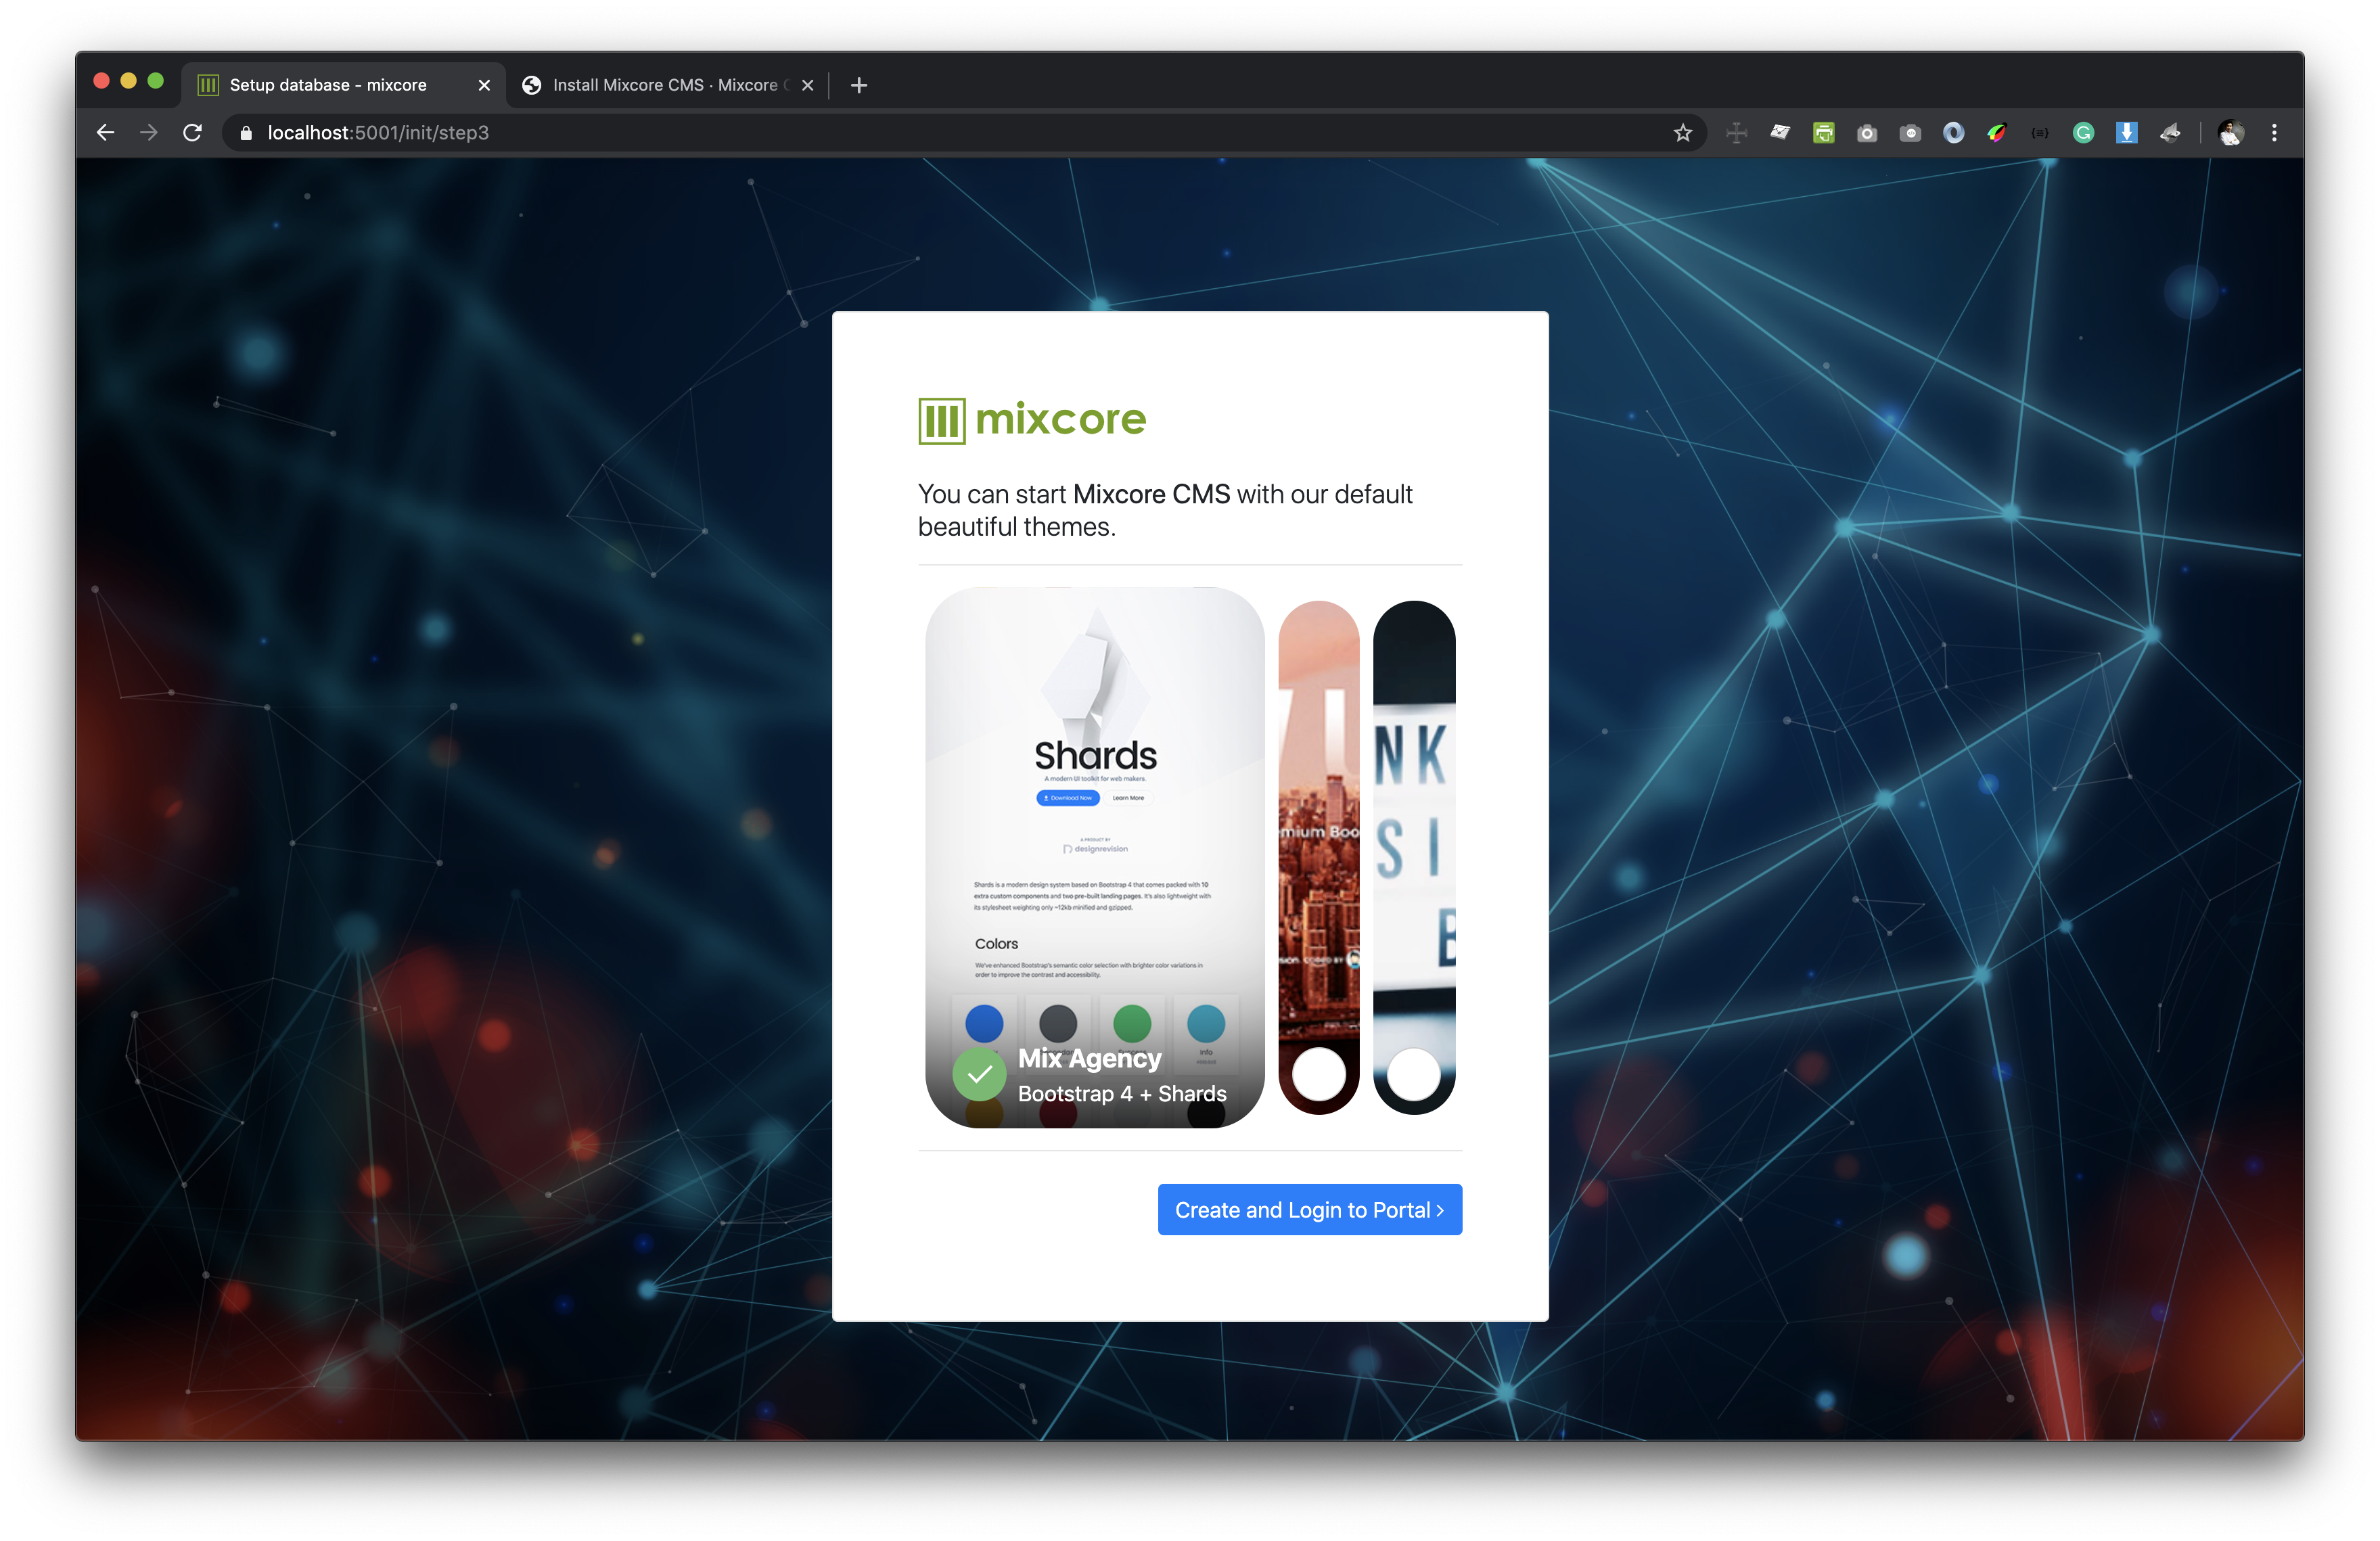
Step 3: Finalization
- Review your settings
- Complete the installation
Option 3: Cloud Deployment
Mixcore supports deployment to major cloud providers:
- Azure: Deploy directly from the Azure Marketplace
- AWS: Use the provided AWS CloudFormation templates
- Google Cloud: Follow our GCP deployment guide
For detailed cloud deployment instructions, see our Deployment Documentation.
After Installation
Once installed, you can access:
- Admin Portal: http://your-domain/portal
- API Endpoints: http://your-domain/api
- GraphQL: http://your-domain/graphql
Next Steps
After installation, you might want to:
- Explore the Basic Usage guide
- Set up your first Module
- Configure your Theme
- Set up Security